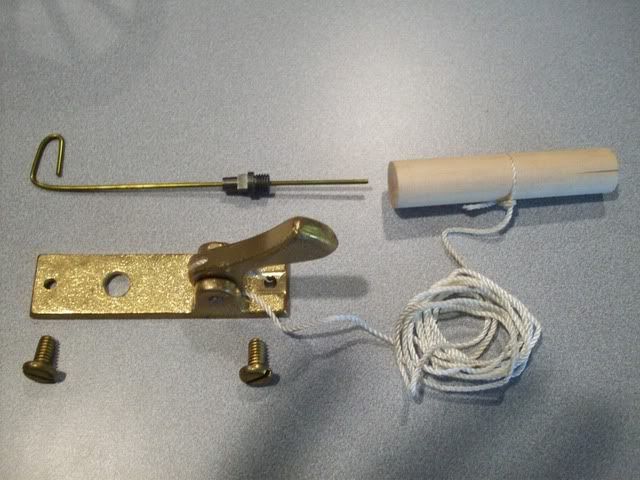
Gobbler, here is my poor attempt at providing you with pictures. The first pictures shows all the parts. This includes the actual brass lock plate with hammer, two mounting screws, one nipple shown on the brass gimlet, along with the lanyard and handle.
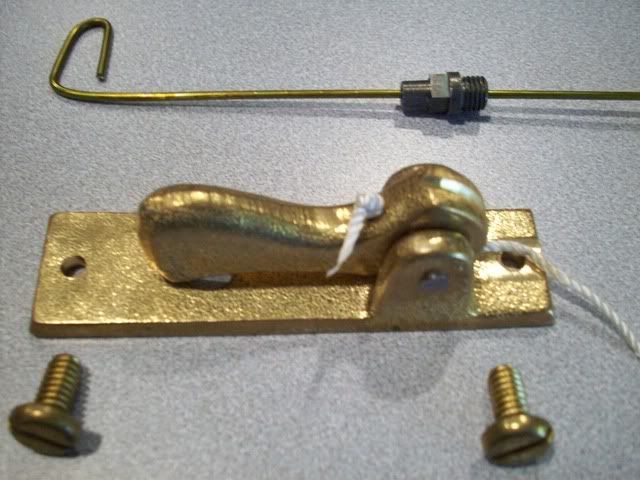
The next picture is a close-up of the lock plate and hammer. This is the position that the hammer would be in after firing.
Essentially, you drill and tap the vent hole in your gun for the nipple. Mine required a 5/16 by 24tpi tapped hole. Then after screwing in the nipple, you mount the lock plate such that the nipple protrudes through the big hole in the lock plate. Then, mark the holes for the lock plate mounting screws, drill and tap them, and secure the mounting plate.
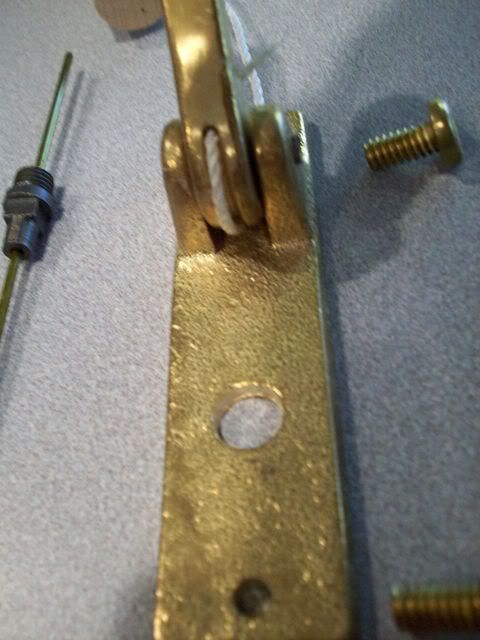
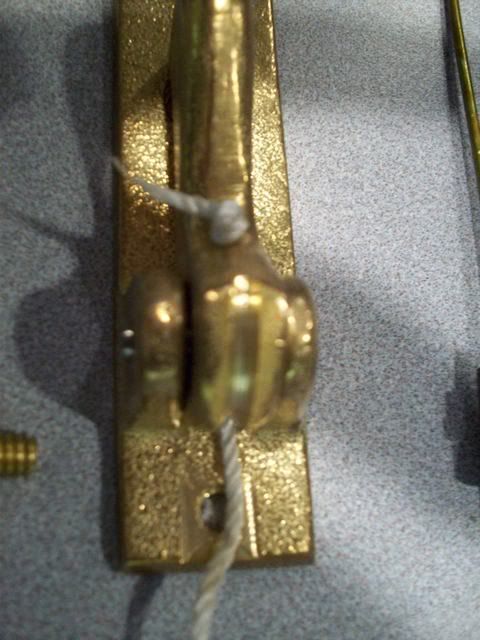
One key to the whole operation is to make sure that the lanyard fits within a groove on the bottom of the hammer. The lanyard actually is secured to the back of the hammer with a knot, but then goes through a hole drilled to the front of the hammer and follows the groove towards the rear. That is what I attempted to show in the following two pictures.
You load the cannon normally. Then you puncture the powder bag with the gimlet through the nipple. Then, carefully put a percussion cap (winged type work best) on the nipple, and make sure the hammer is tilted all the way back and that the lanyard is in the groove. When ready to fire, give the layard a short snap like pull. Boom.
Hope that helps if you decide to go this way.