I'd first posted about this new-to-me "M. Moeller" Martini from Zella-Mehlis Germany/ (1924) (click for link) over 3 weeks ago. Just as we all come here for levergun info -- and the camaraderie around the campfire
I've made some progress on replacing the non-functioning "aluminum" key part of the action -- the toggle which is cocked by the lever, retracts the striker and is held by the sear. This image was provided to me on another forum and was helpful to show how the toggle worked and its likely shape:
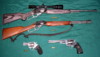
Here are the major parts of my Martini, along with the no-good aluminum toggle that was in it when I bought it:
I covered the left side of the receiver with tape and mounted the tilting block and lever parts on the outside, which allowed me to better visualize what was happening inside the action:
I'd also posted on a rimfire Martini forum looking for some animation of a Martini in action, and while the triggers of the British design are placed differently than on my German gun, this Martini Action Animation (click for link) was also helpful.
Take a look -- it uses a lever!
At the top of this next image, you'll see the 3 critical bearing surfaces of the Martini toggle circled on a part from another German Martini (maker unknown, but it's similar to mine). At the bottom, at the far left you see the original aluminum part -- which didn't work -- followed by 6 iterations of hard plastic parts that I made to check dimensions and fit. Note I copied the first part twice, before I obtained the background image and that changed my whole approach to making a plastic proof part. I could draw, drill, cut and trim a new plastic part in about half an hour, as all the final trimming was done with a sharp Xacto knife. The last 2 plastic parts on the right side worked, with the one on the right working the best, so I used that as a guide and made that last one on the right tonight from aluminum.
That aluminum piece (top half is colored black with a Sharpie to see where it was rubbing other parts) took me over 2 hours to make, 4 times longer than the plastic ones, as I had to hand cut and file it to final shape. The small jig saw that I'd used for the hard plastic was no help on the aluminum. But still, using the hard plastic for making several "proof parts" did get me to where this Martini is now functioning!!!
Next steps, coming soon...
I'll enlist the services of my brother-in-law's machine shop to mill a new toggle made of steel, thus replacing the plastic and aluminum proof parts -- and getting me that much closer to finally pulling the trigger on this Martini.
Wow, I think I'll celebrate with a MARTINI for finally getting to this step!
Tight groups!
Old No7