“Arts & Crafts” (lots of pictures)

Welcome to the Leverguns.Com Forum. This is a high-class place so act respectable. We discuss most anything here ... politely.

Moderators: AmBraCol, Hobie

Forum rules
Welcome to the Leverguns.Com General Discussions Forum. This is a high-class place so act respectable. We discuss most anything here other than politics... politely.

Please post political post in the new Politics forum.
Post Reply
User avatar
Ysabel Kid
Moderator
Posts: 27903
Joined: Mon Sep 17, 2007 7:10 pm
Location: South Carolina, USA
Contact:

“Arts & Crafts” (lots of pictures)

Post by Ysabel Kid »

Okay, “arts & crafts”, firearms-related!

For the “old hands” here, many will recall a number of years ago I tinkered with making some homemade “old timey” cartridge boxes. These were for metallic cartridges. I really enjoyed making these, and have a “kit” put aside when I get the urge to crank another one out. Here’s the link to that original post:

http://www.levergunscommunity.com/viewt ... tridge+box

Looking up the old post, I can’t believe this was eight years ago!!!

Well, those were for metallic cartridges. I’ve always wanted to do some for paper or “combustible” cartridges for black powder cap & ball revolvers. Getting back into shooting these the last year or so, made me want to do so even more. Finally, earlier this year I cleaned up a pair of cap & ball revolvers for a family friend. Since he had nothing to shoot in these, I broke out the old “paper cartridge making kit” – which hadn’t seen the light of day in over two decades – and made a bunch of combustible cartridges for the .44 caliber revolvers.

This really gave me the itch!

Anyway, long story "somewhat" short, I finally had a week in my home office this week, instead of being stuck in a hotel 100’s of miles (or more) from home, so I actually had some time in the evenings. I decided to try making a Paper Cartridge box. Here’s my first try...

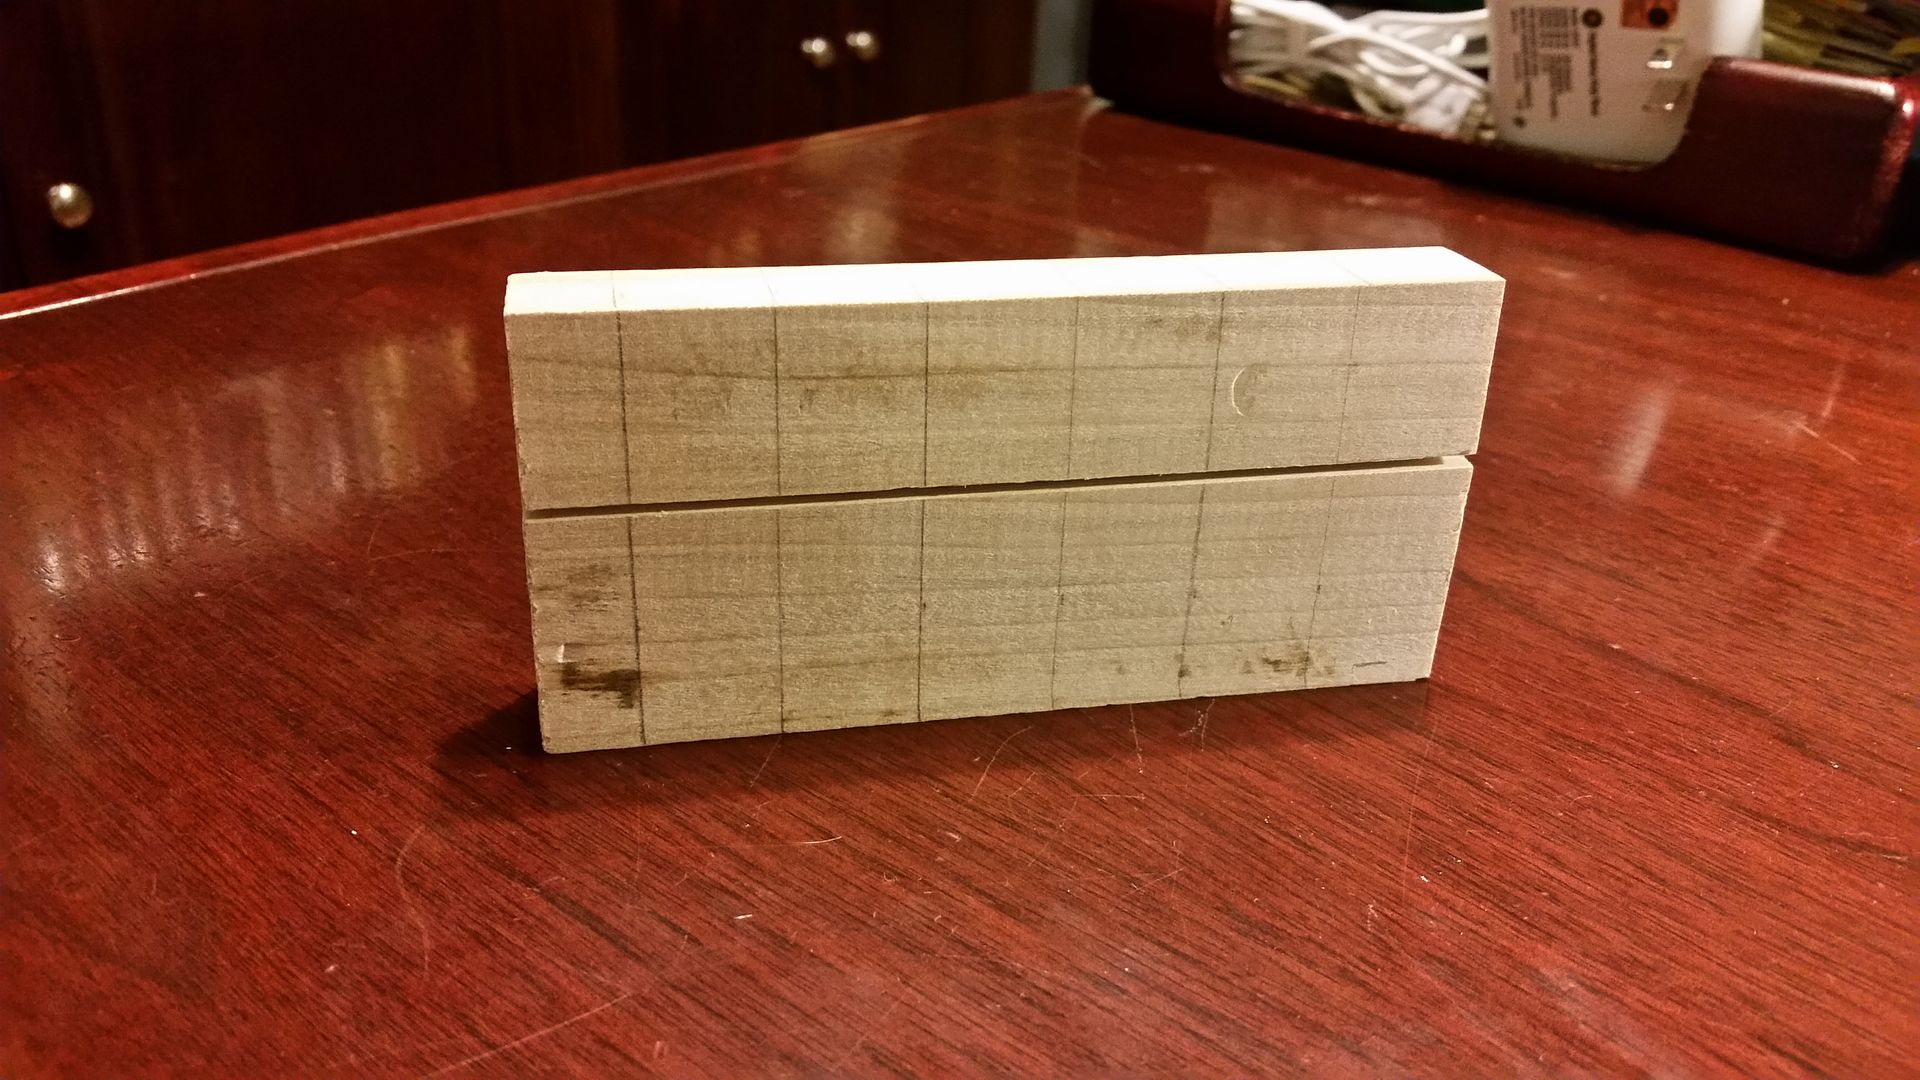
I did a little research on line, and decided to use some poplar as the wood. I marked my holes, cut it to size, then cut it for the top and bottom pieces. Here’s what the wood cut looks like:
Image

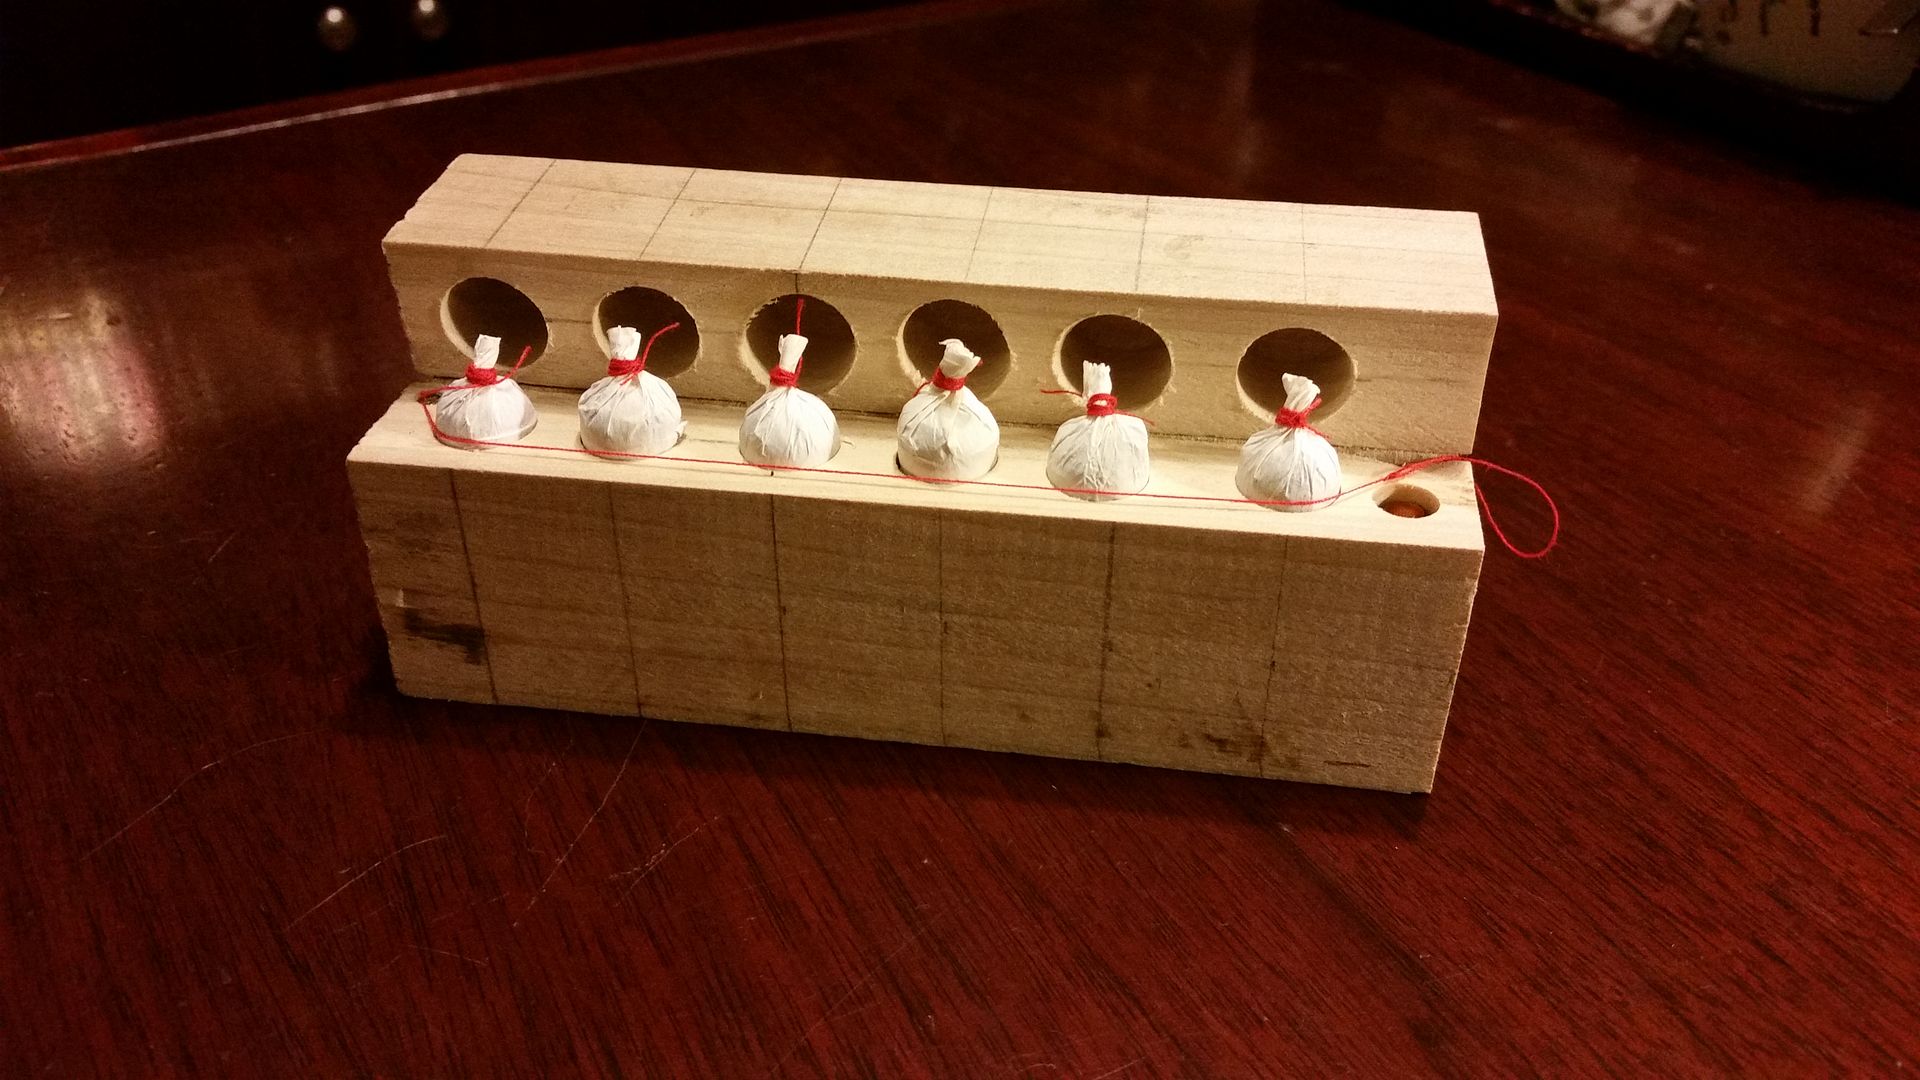
Next, I drilled out the holes on my drill press. Still free-hand; something I will address in the future by making a jig. Here is the box cut, drilled, and filled! The paper cartridges fit into the larger bottom section, while the top covers the round ball itself. The red string is used to pull through the paper cover to open the box. Red string was Y2K’s idea, since I used red string to tie the paper of the paper cartridges (and I use red string for 30 grain loads).
Image

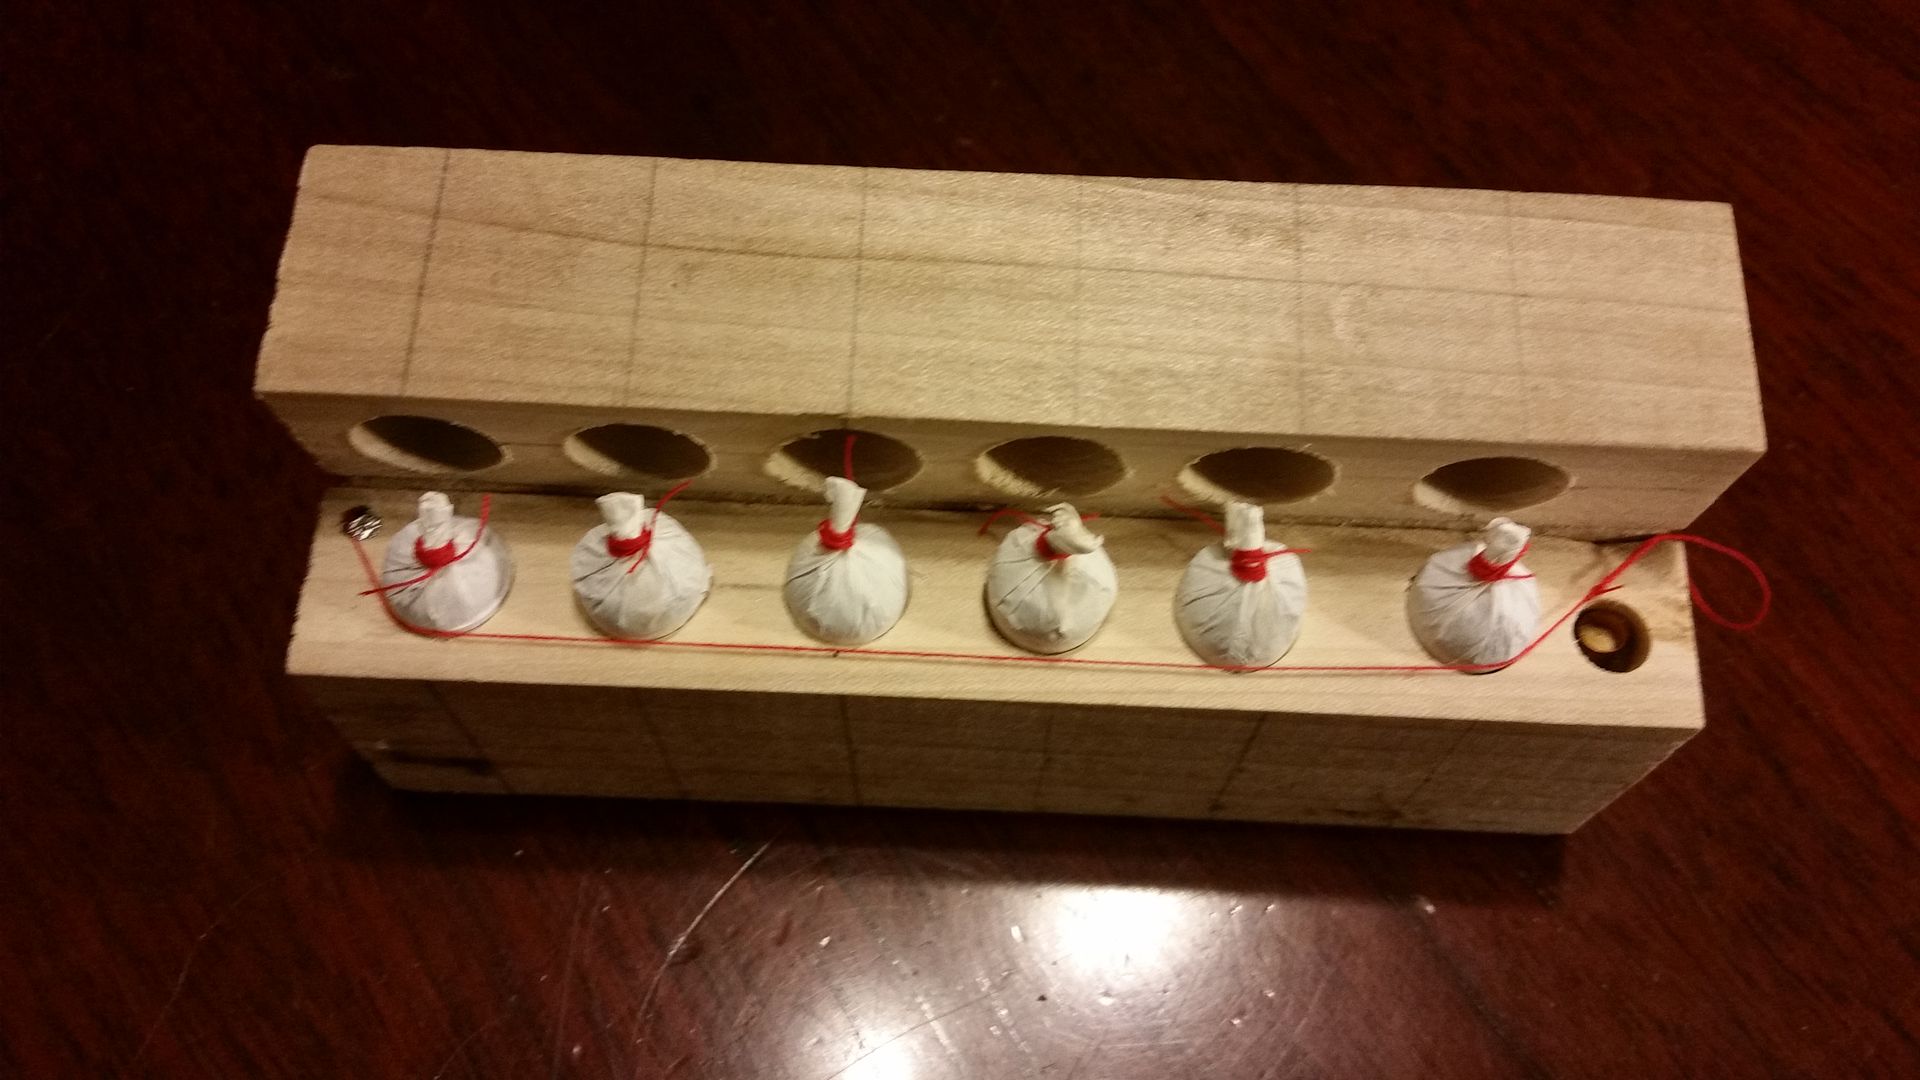
Original boxes often included percussion caps. Instead of a sleeve of them wrapped in paper, I decided I would drill out a smaller diameter hole to use for the percussion caps. It is on the right, and you can see the percussion caps from this view:
Image

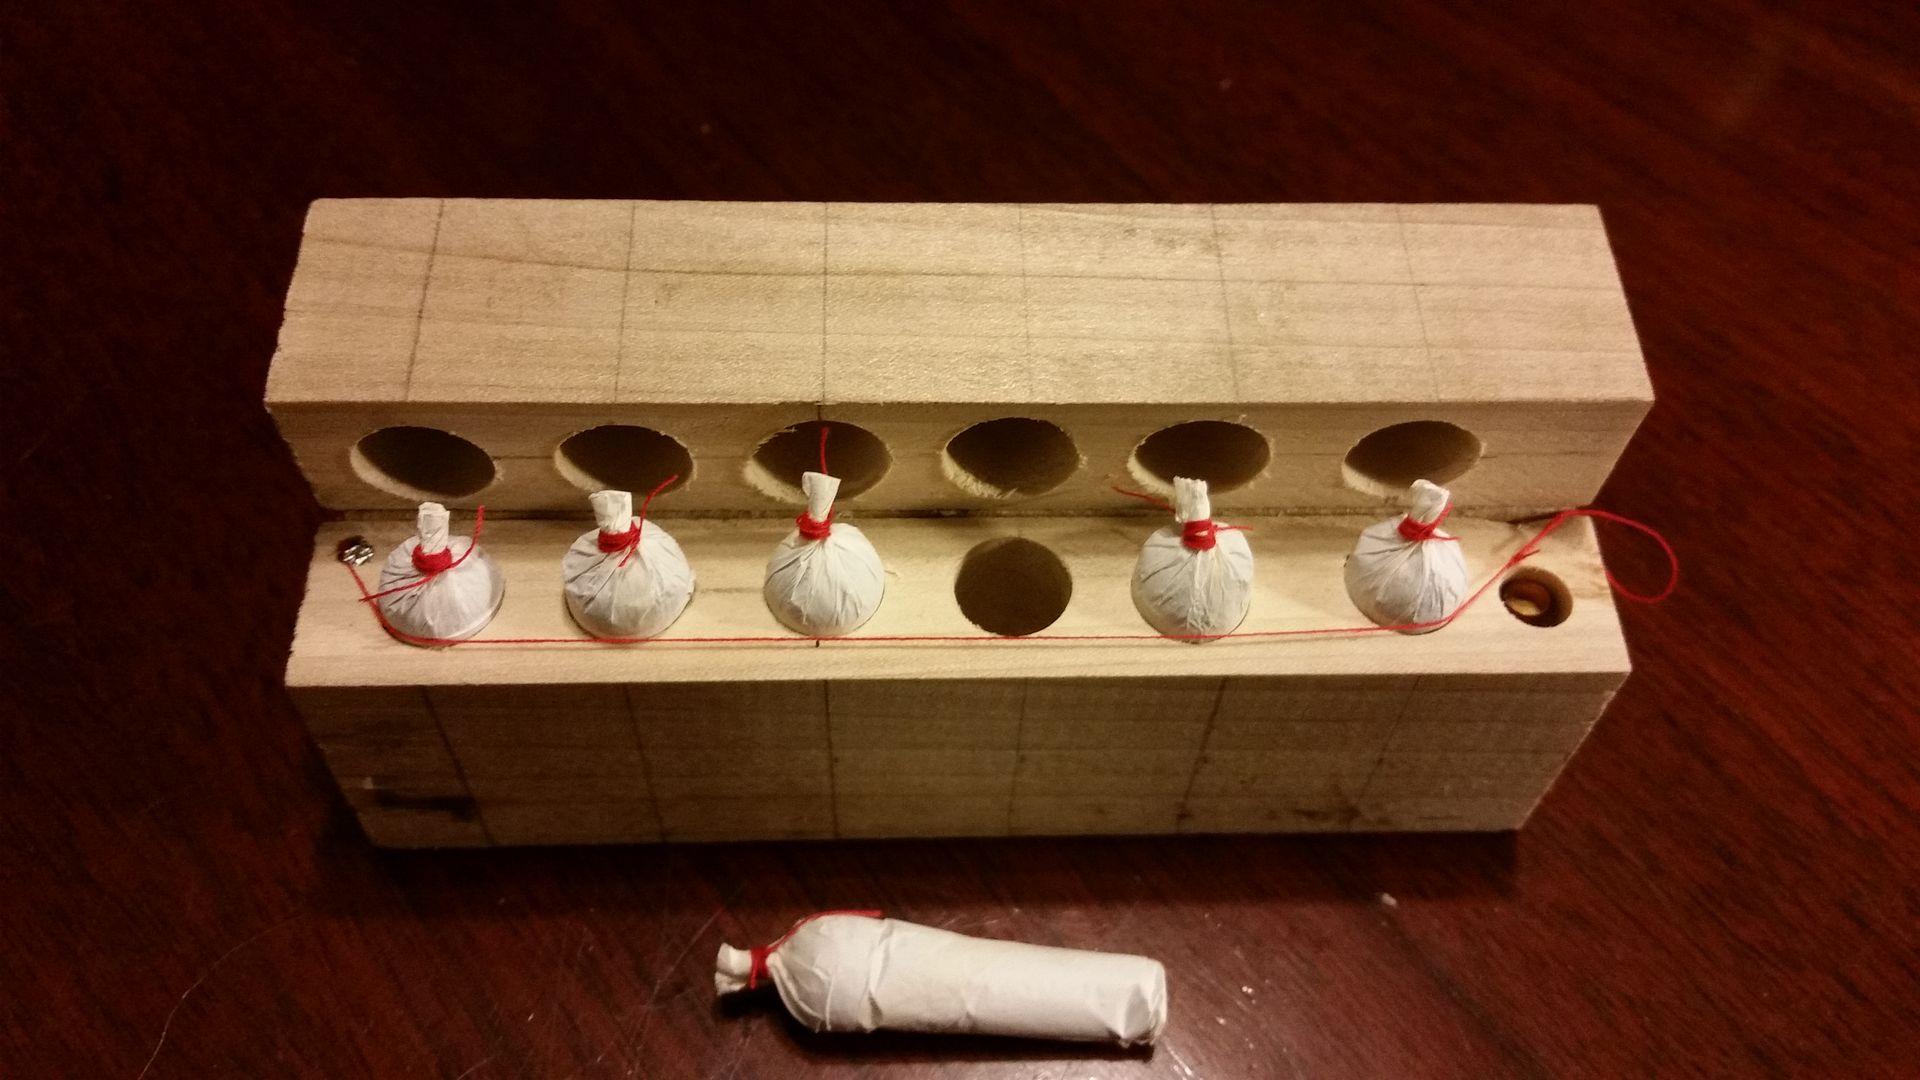
Here is a view with one of the paper cartridges out of its holder. I’ll do another post on making these (I know; I should have done that one first!)
Image

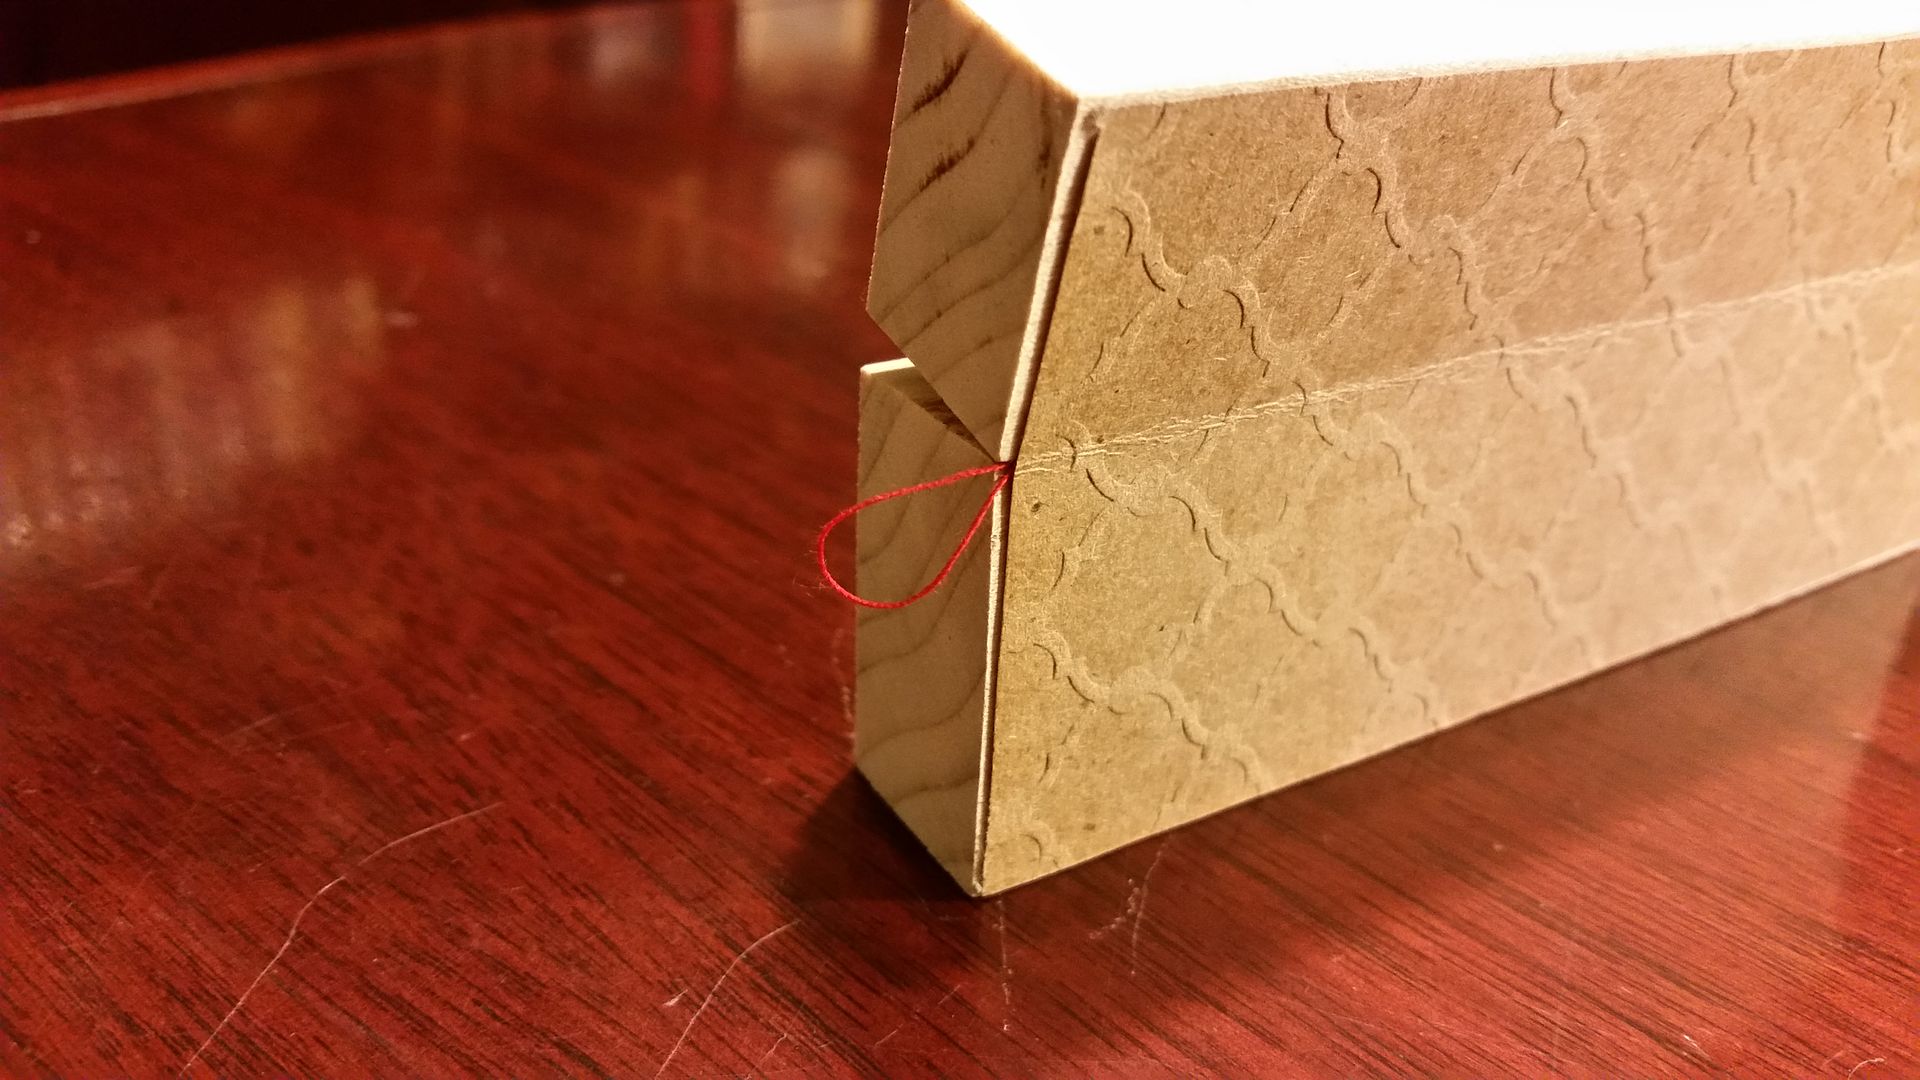
Here is a close-up shot of the back of the cartridge box. The “hinge” is a piece of heavy craft paper – like the paper or cloth used in the originals. I though this design looked appropriate and “vintage”. You can also see the pull string. In the future, I will use thin wire for this versus thread.
Image

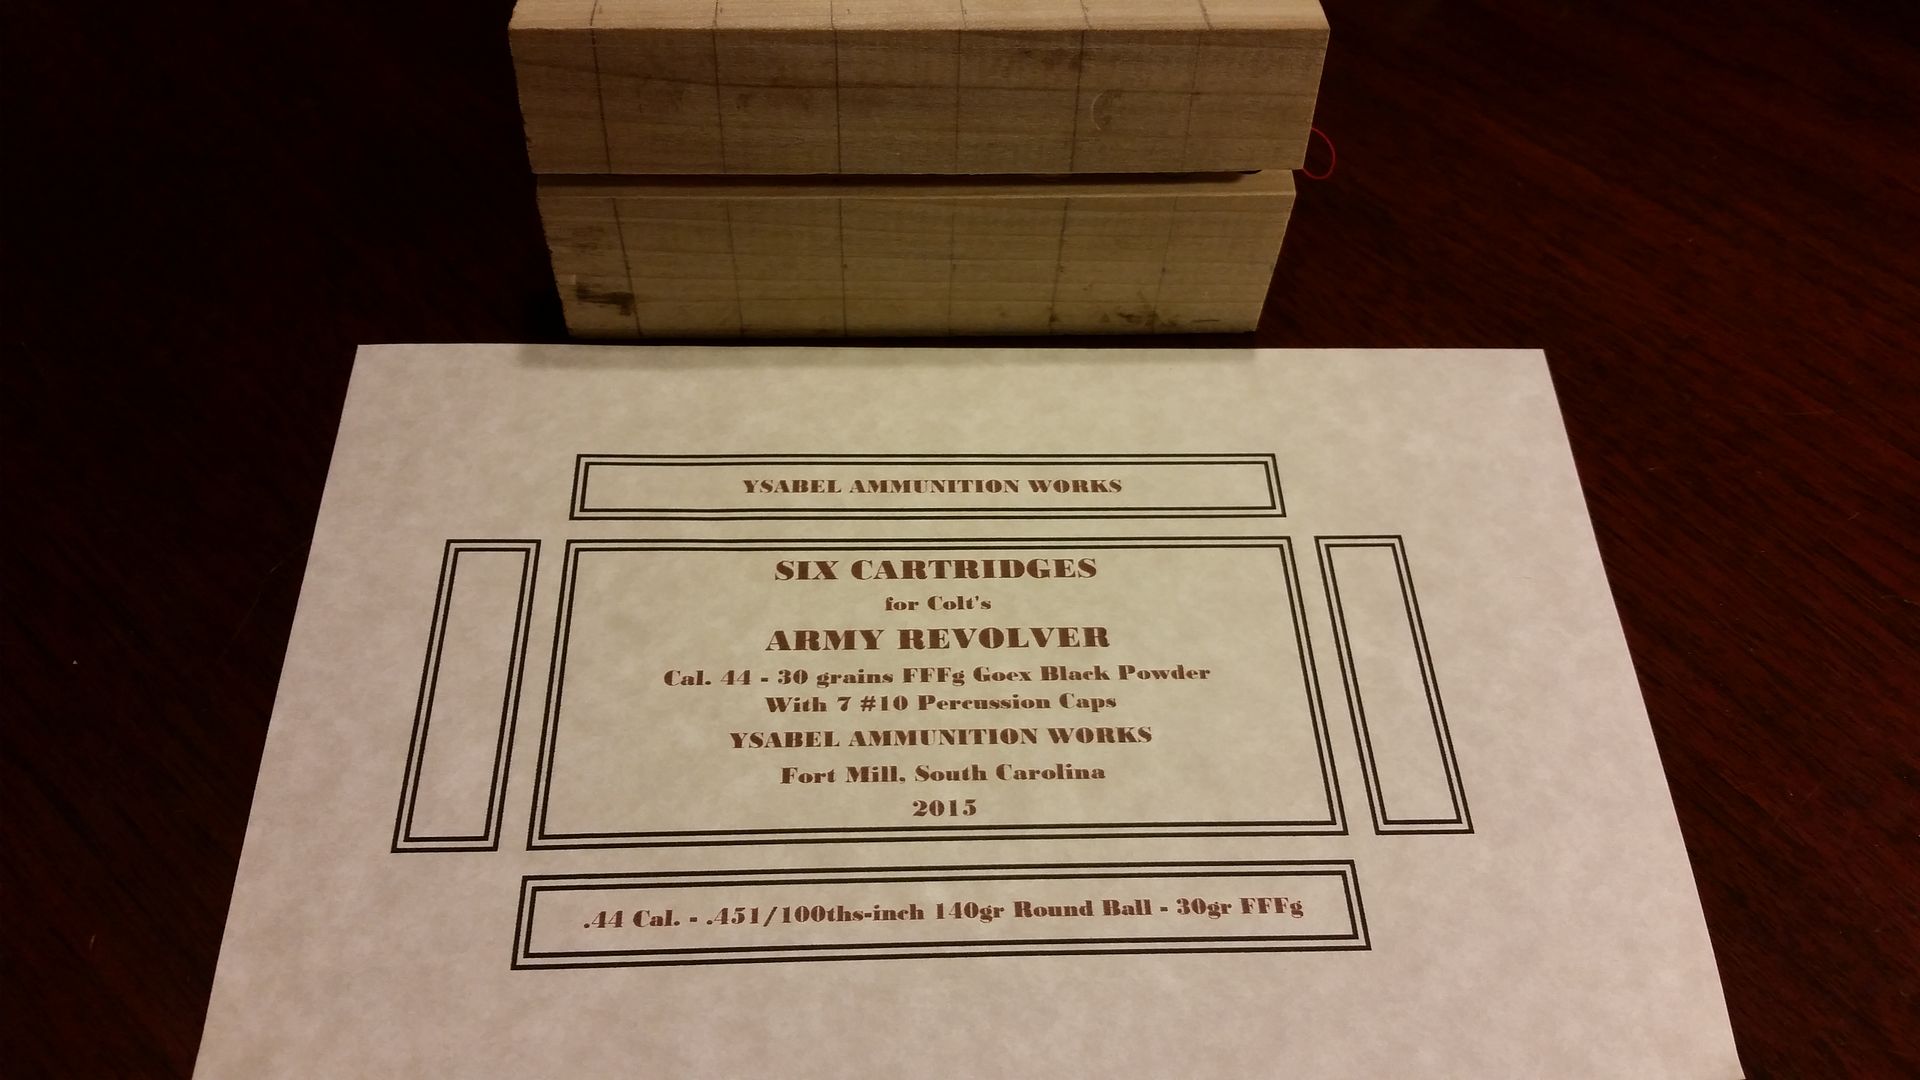
I looked on the internet for pictures of vintage paper cartridge boxes to get ideas for my “cover”. Here is what I came up with. Certainly not 100% authentic, but I do think it keeps with the spirit of those original boxes.
Image

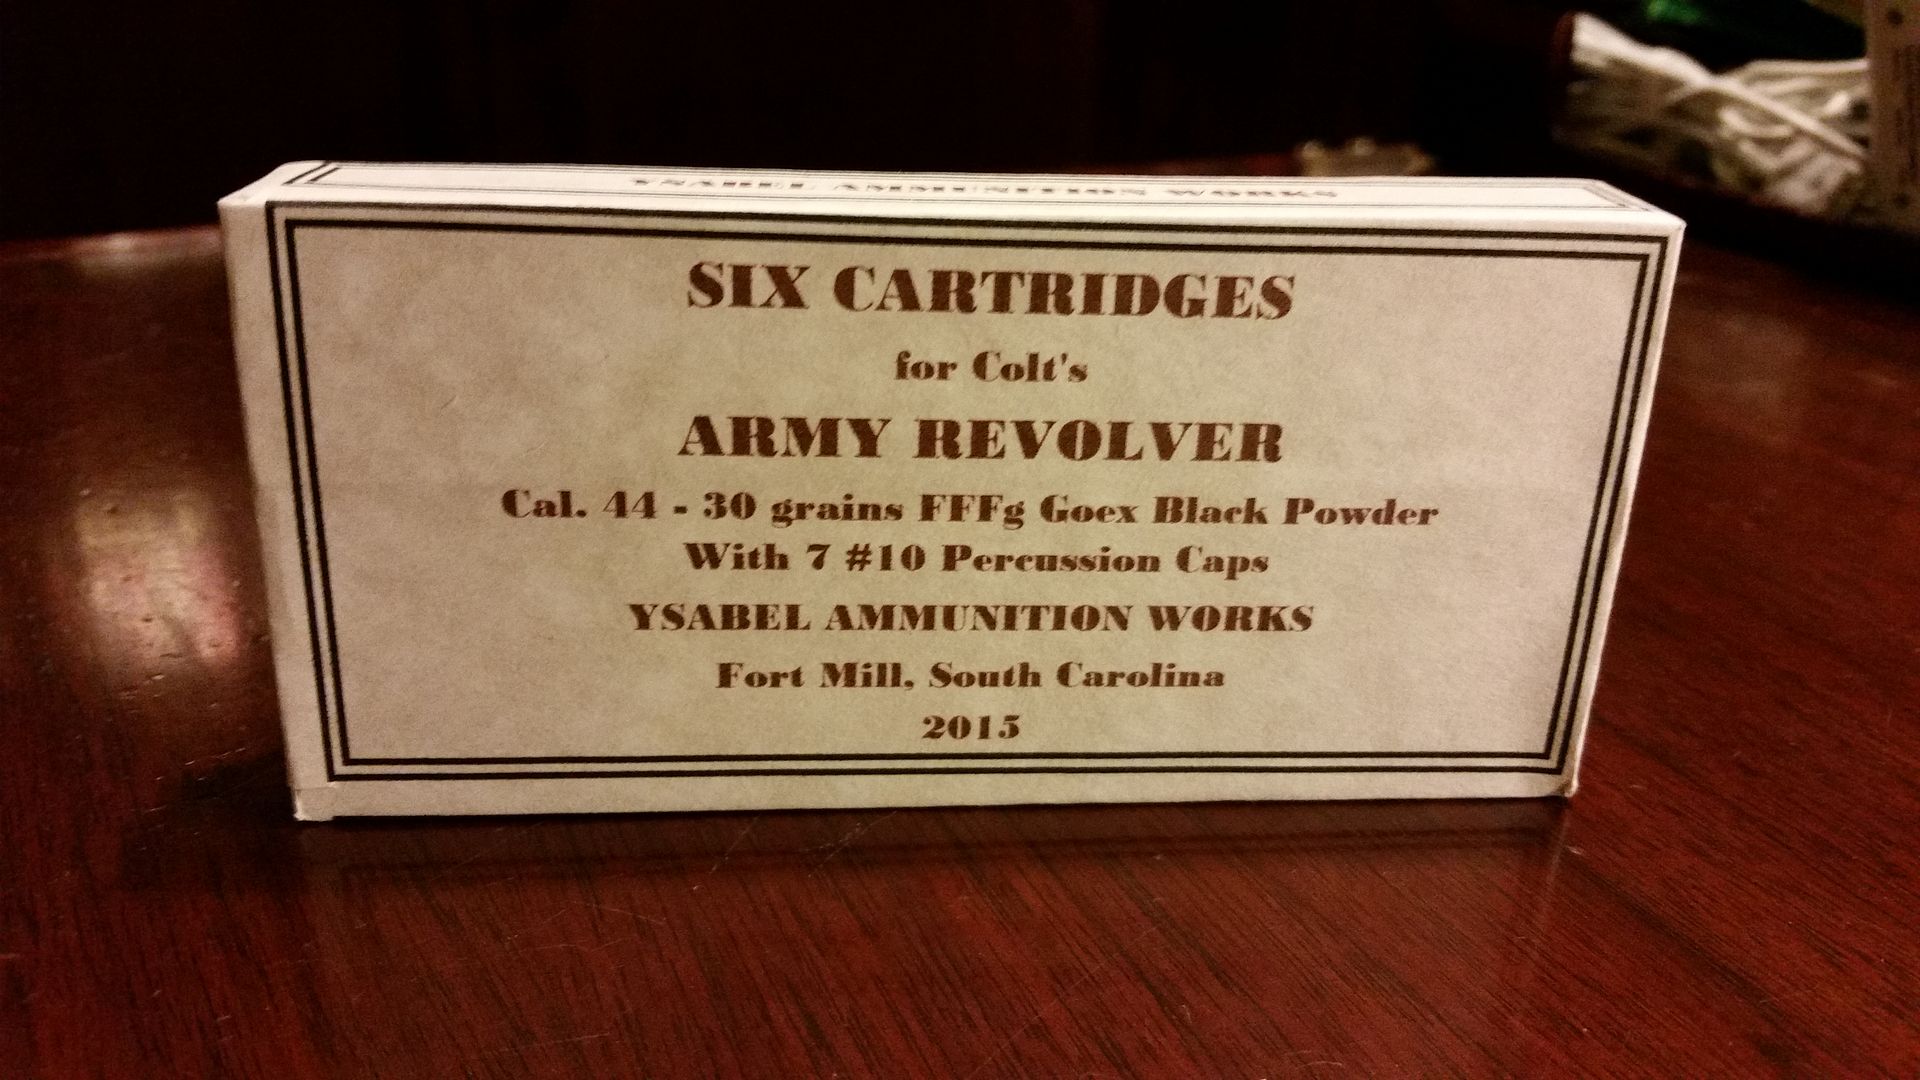
So, here is what it looks like assembled:
Image

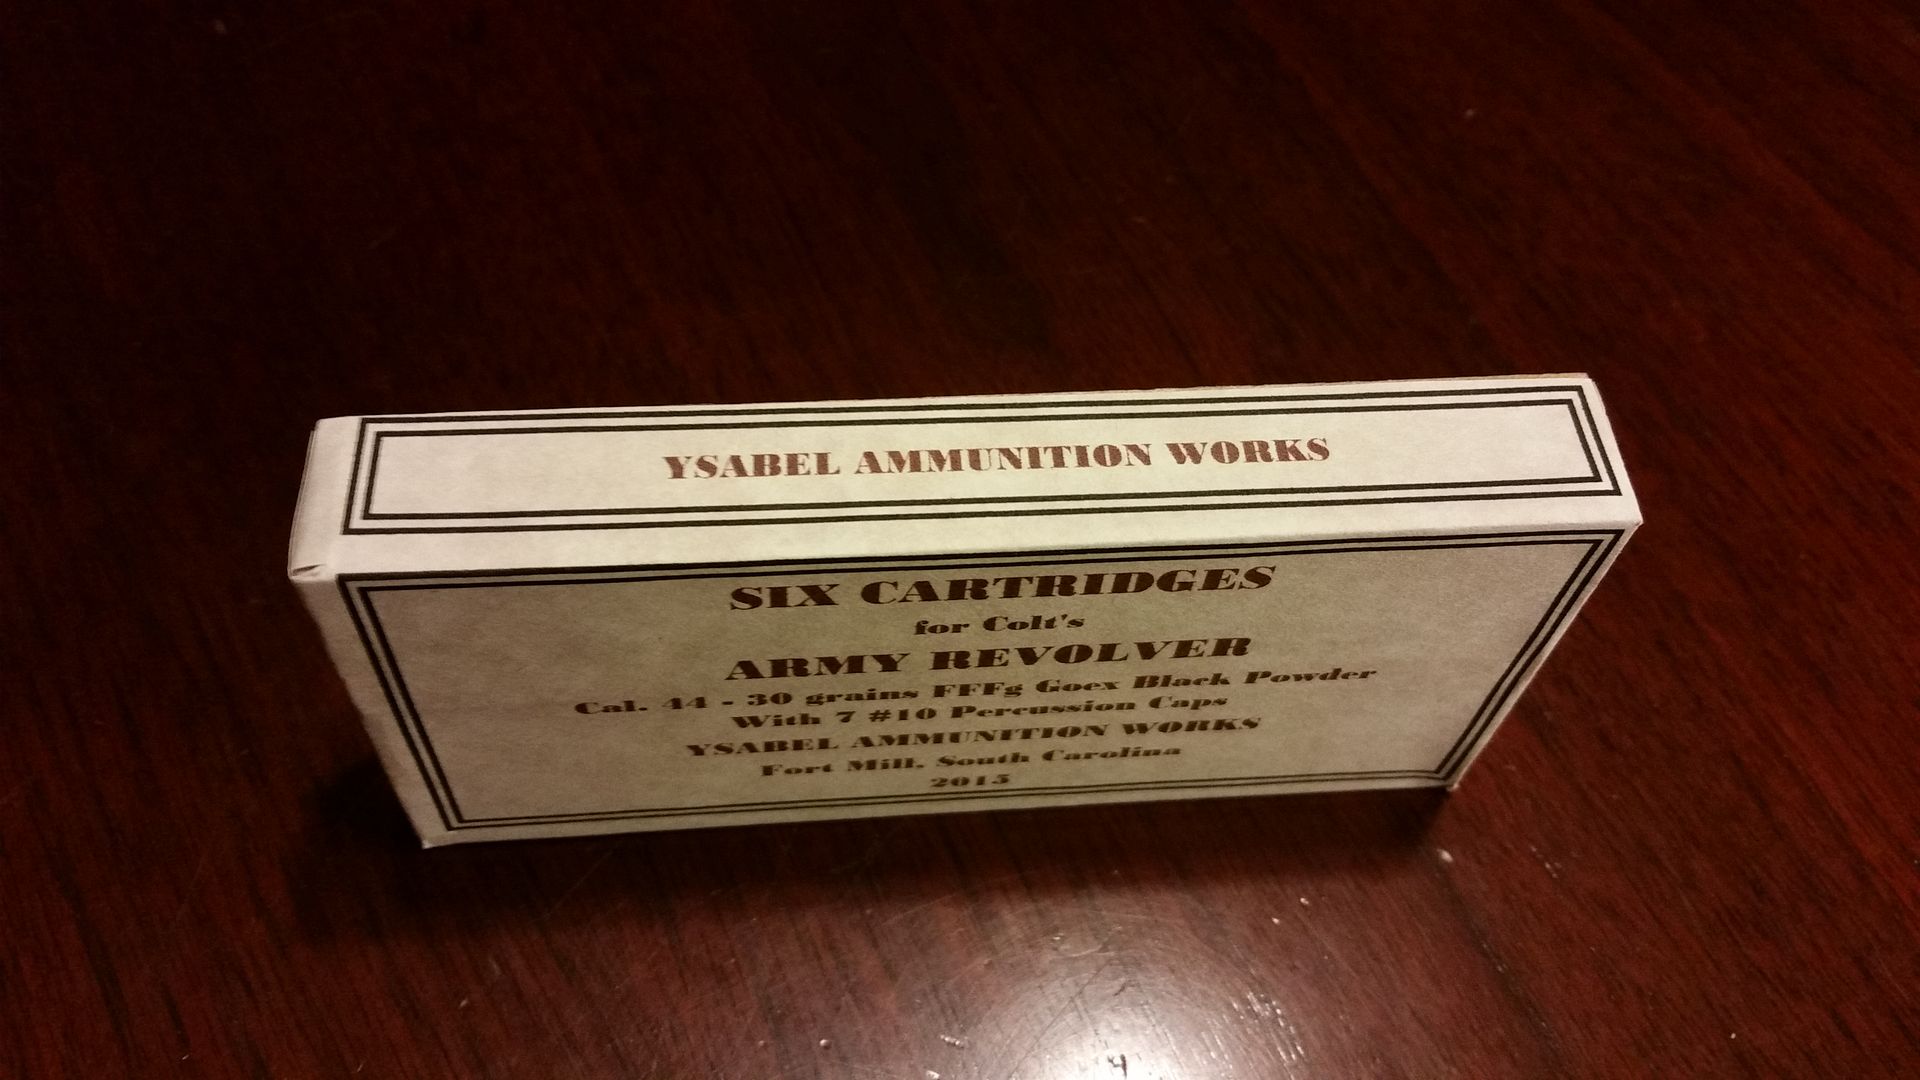
I created “wings” or “tabs” for mine. On the top is the same “company name” I used for the metallic cartridge boxes. What else? “Ysabel Ammunition Works”! 
Image

On the bottom I included load data. Not necessarily period-correct, but who knows, some future grandchild or great-grandchild might be the one to use these, and I want them to know what the heck I loaded!
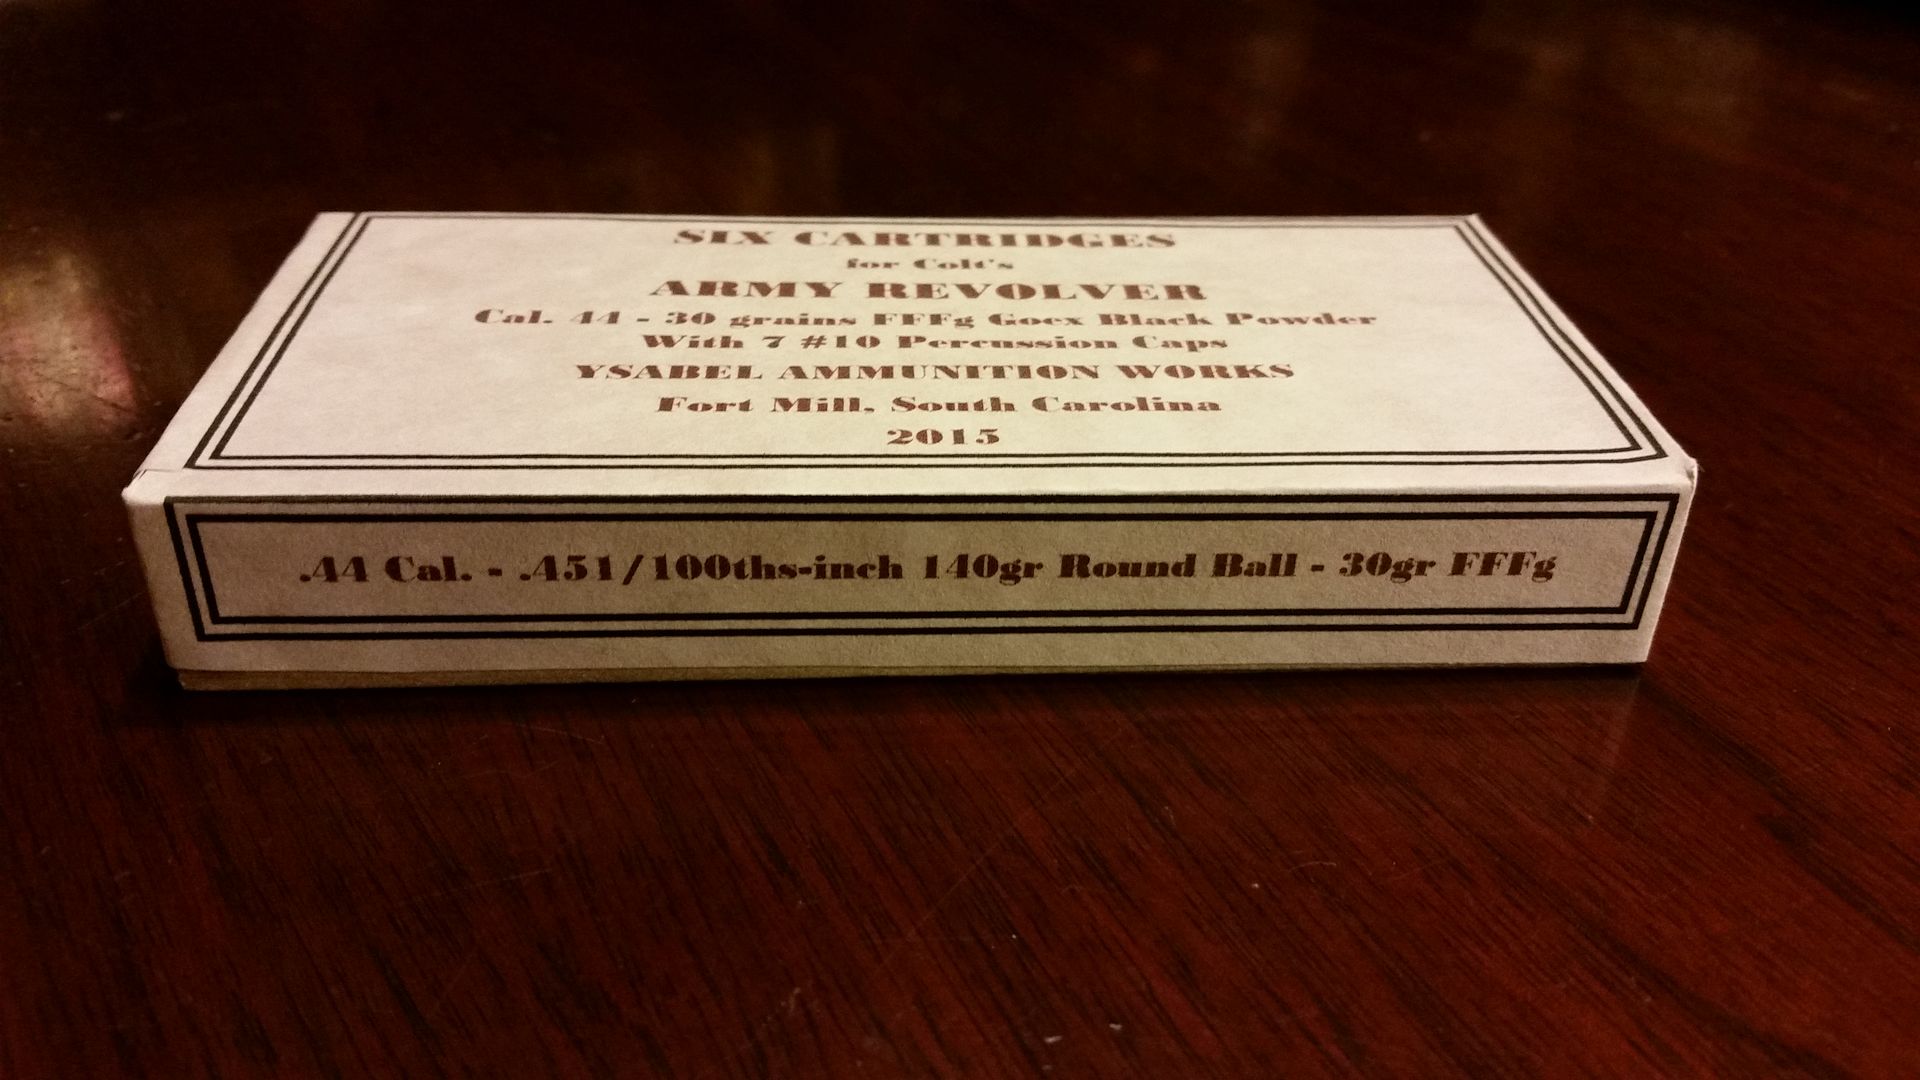
Image

Here’s a good view of the front face, bottom, and pull string:
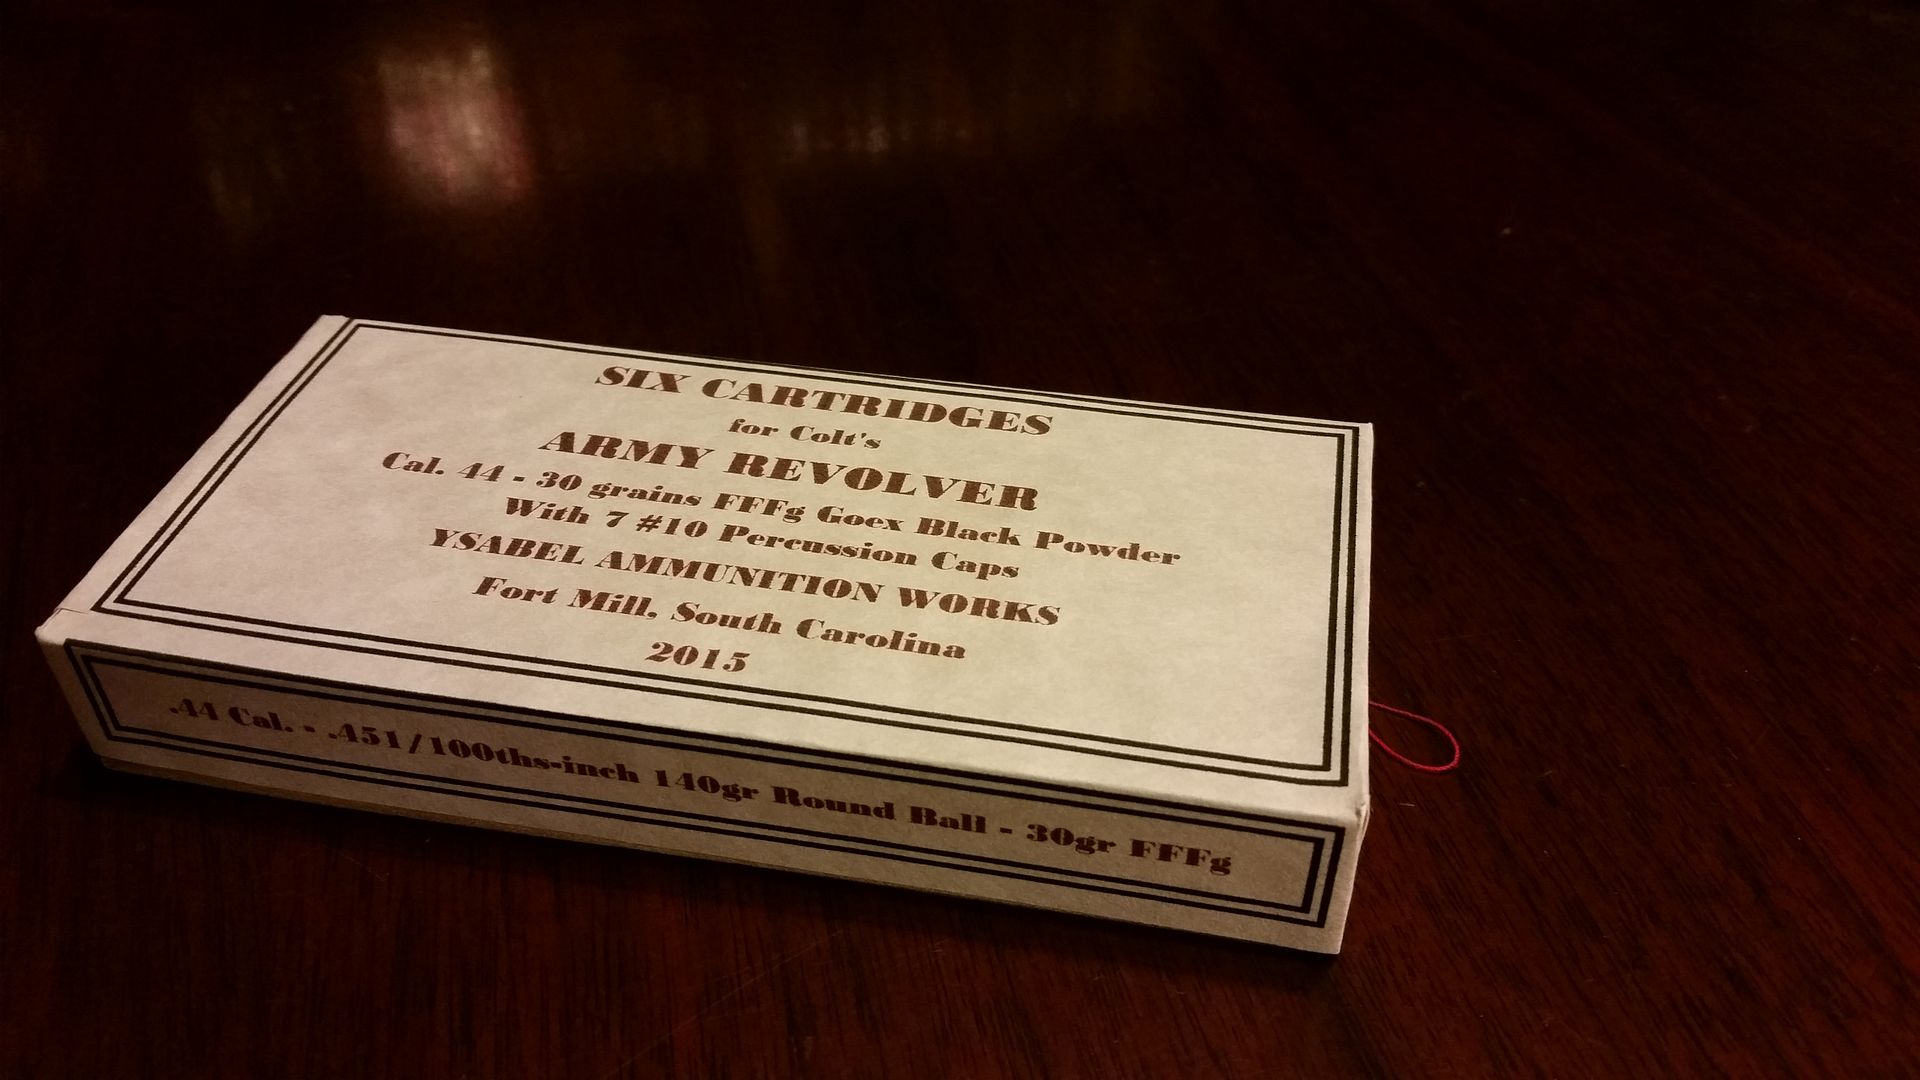
Image

And last, the pull string on finished box (as compared to earlier on the unfinished one). Now you see that it would be pulled across to rip the label into two sections, along the divide of the wood, allowing access to the combustible cartridges contained within.
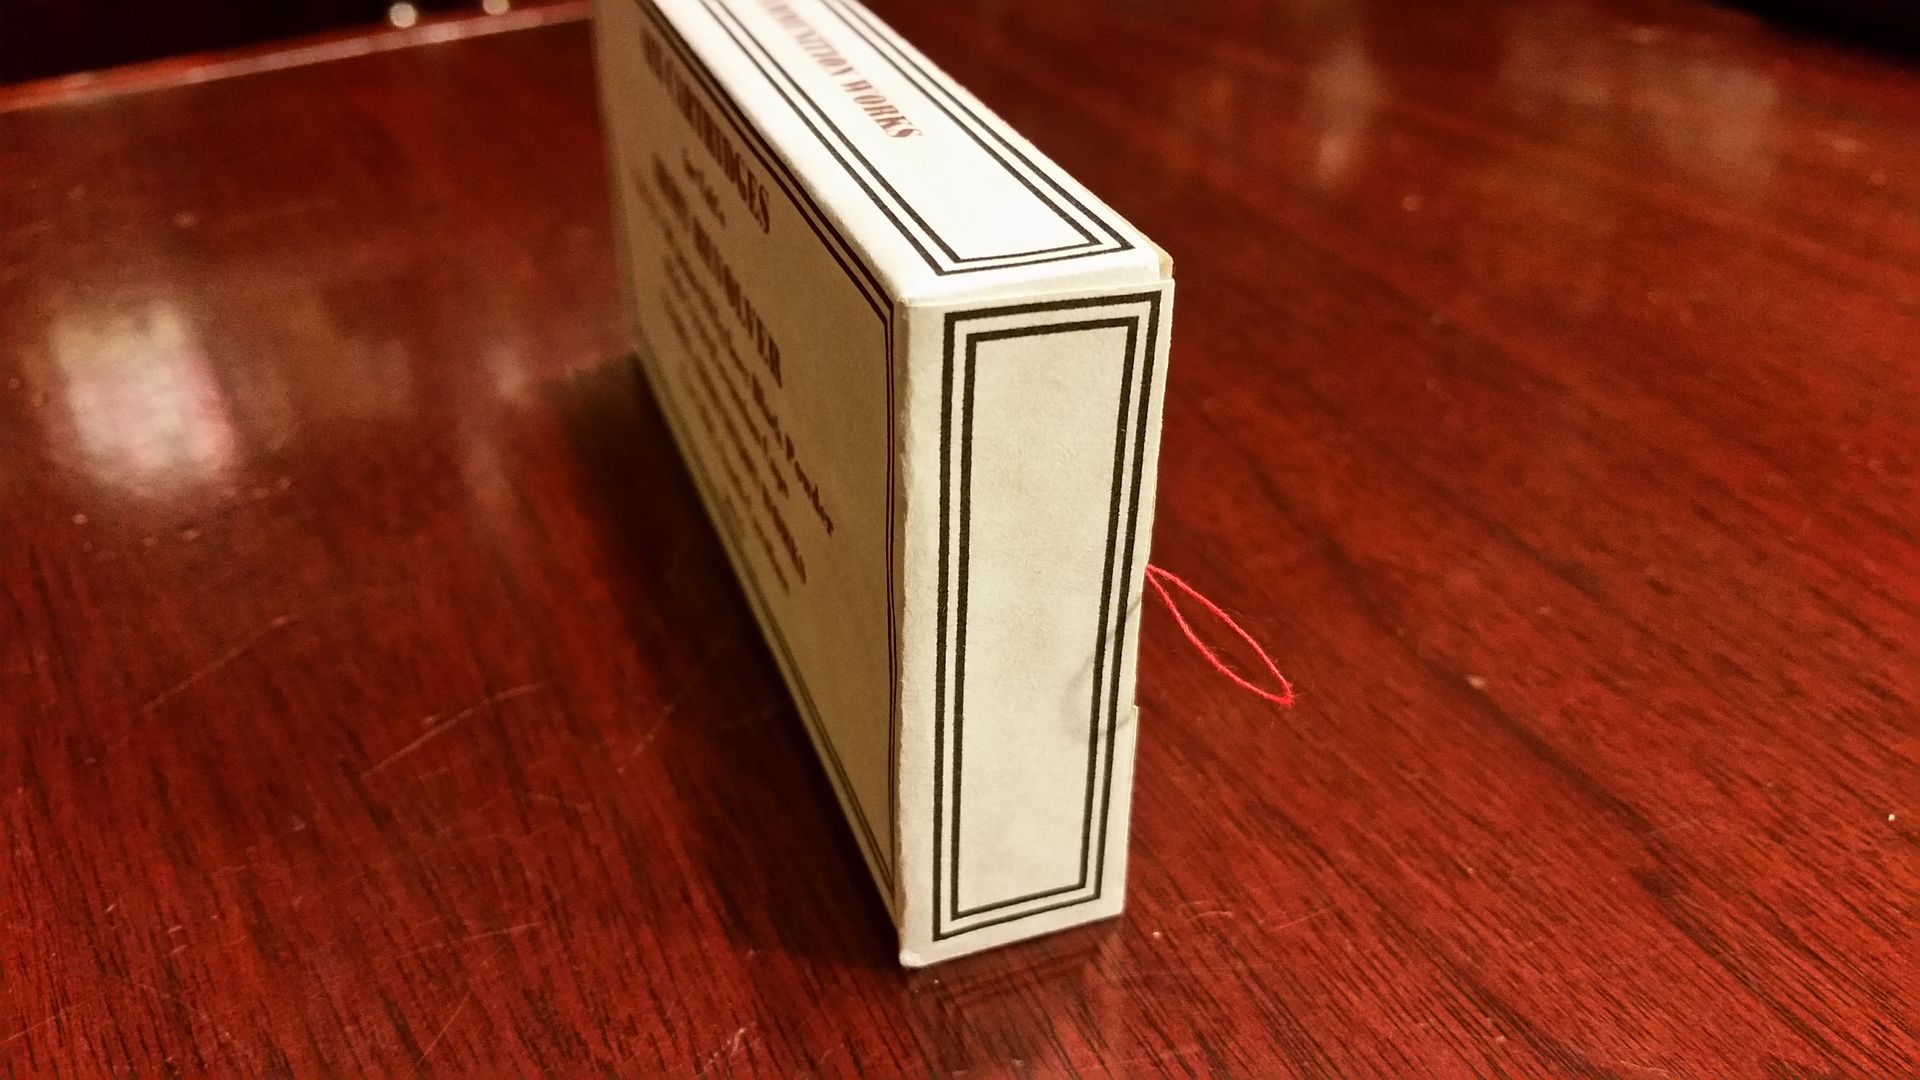
Image

This was a fun and pretty quick project. I have decided I want to create a jig, and make some of these in .44 caliber, .36 caliber and .31 caliber for the various cap & ball revolvers I own. I’m going to alter the design a little bit. I don’t need as much room as I gave myself, so the future boxes won’t be as wide (i.e. – I’ll space the holes closer). As I said above, I’m going to use a thin wire for the paper tear – when I make a label like this one. I got another idea off the web (the capandball YouTube channel, where I got the thin wire idea). I am going to make a cardboard sleeve, so I can reuse the box over and over again without destroying the label. I’ll probably make at least one paper-label version for each “ladies group” in my sorority (as Old No7 calls my collection), then a few of the cardboard-sleeved ones to use repeatedly when I take them shooting (and probably use oak as the wood in those ones).

What do you think?
Image
Richardx
Levergunner 2.0
Posts: 142
Joined: Wed Sep 28, 2011 11:30 am

Re: “Arts & Crafts” (lots of pictures)

Post by Richardx »

YK you and all the other talented folks on this forum leave me far behind.
Great work!
missionary5155
Levergunner 3.0
Posts: 795
Joined: Mon Feb 16, 2009 7:09 pm
Location: Arequipa, Peru till 2020

Re: “Arts & Crafts” (lots of pictures)

Post by missionary5155 »

Greetings YK
That is one fine job you did there. Never thought I would see a brand spanking new caliber 44 box of ammo ready to be ripped open.
Mike in Peru
A sinner saved by FAITH in the Blood of Jesus Christ &teaching God´s Word in Peru. John 3:36
Tanker 71-74 NRA Life Ready to Defend the Constitution from enemies within and without.
octagon
Senior Levergunner
Posts: 1902
Joined: Mon Dec 17, 2007 4:56 pm
Location: TEXAS

Re: “Arts & Crafts” (lots of pictures)

Post by octagon »

Poplar is a nice stable wood, good choice, nice work :D
User avatar
plowboy 45
Senior Levergunner
Posts: 1370
Joined: Thu Dec 26, 2013 9:42 pm
Location: PURVIS, MISSISSIPPI

Re: “Arts & Crafts” (lots of pictures)

Post by plowboy 45 »

Man, that's just dadgone downrite and all other words that might apply, SKIPPY
Way to cool
JerryB
Advanced Levergunner
Posts: 5493
Joined: Mon Apr 02, 2007 9:23 pm
Location: Batesville,Arkansas

Re: “Arts & Crafts” (lots of pictures)

Post by JerryB »

You have created some fine art and a very useful product, are you going into production? I can't wait for my son to see this, maybe make one for his .36 Navy. He does like wood working.
JerryB II Corinthians 3:17, Now the Lord is that Spirit: and where the Spirit of the Lord is, there is liberty.

JOSHUA 24:15
Daisyman
Levergunner 2.0
Posts: 421
Joined: Tue Mar 02, 2010 11:24 am

Re: “Arts & Crafts” (lots of pictures)

Post by Daisyman »

When I got to reading this, I thought , " he's not going to cut through that dandy label is he???" :o Then right at the end, the fine idea of the cardboard sleeve. Nice work and very professional looking. :mrgreen:
User avatar
claybob86
Senior Levergunner
Posts: 1907
Joined: Mon Apr 02, 2007 10:41 pm

Re: “Arts & Crafts” (lots of pictures)

Post by claybob86 »

Very nice! :D
Have you hugged your rifle today?
User avatar
gamekeeper
Spambot Zapper
Posts: 17458
Joined: Thu Sep 06, 2007 3:32 pm
Location: Over the pond unfortunately.

Re: “Arts & Crafts” (lots of pictures)

Post by gamekeeper »

What a great project and practical too. 8)
Nice to have a few quick loads for Cap n Ball revolvers, just in case you need 'em :wink:
Whatever you do always give 100%........... unless you are donating blood.
User avatar
RIHMFIRE
Advanced Levergunner
Posts: 7655
Joined: Fri Sep 07, 2007 11:51 am
Location: Florida

Re: “Arts & Crafts” (lots of pictures)

Post by RIHMFIRE »

VERY NICE WORK.
LETS GO SHOOT'N BOYS
User avatar
Old No7
Advanced Levergunner
Posts: 3602
Joined: Tue Dec 18, 2007 9:06 pm
Location: Southern Maine

Re: “Arts & Crafts” (lots of pictures)

Post by Old No7 »

Well done Jay.

Your "sorority girls" will love those!

Glad to see you finally got some "me time" at the house -- hope you had some nice dinners and chat with the family too. :wink:

Old No7
"Freedom and the Second Amendment... One cannot exist without the other." © 2000 DTH
Bill in Oregon
Advanced Levergunner
Posts: 9047
Joined: Sun Jun 29, 2008 10:05 am
Location: Sweetwater, TX

Re: “Arts & Crafts” (lots of pictures)

Post by Bill in Oregon »

Too purty to use!
User avatar
Grizz
Advanced Levergunner
Posts: 11987
Joined: Fri Aug 31, 2007 7:15 pm

Re: “Arts & Crafts” (lots of pictures)

Post by Grizz »

that's a work of art. thanks for posting the technique.
Lassiter
Levergunner 2.0
Posts: 381
Joined: Fri Jan 28, 2011 7:28 pm

Re: “Arts & Crafts” (lots of pictures)

Post by Lassiter »

That's cool!
User avatar
Ysabel Kid
Moderator
Posts: 27903
Joined: Mon Sep 17, 2007 7:10 pm
Location: South Carolina, USA
Contact:

Re: “Arts & Crafts” (lots of pictures)

Post by Ysabel Kid »

Before anyone gets excited and rushes off to do their own (these are easy to do, so I encourage it), a fellow levergunner here pointed out my math is incorrect! Instead of ".451/100ths-inch", it should read, "451/1000ths-inch". I pulled the idea off a picture of an original paper cartridge box, which said "44/100ths-inch". Since I had the exact measurement, I just used that, but in my zest, made two mistakes. I kept the decimal point, and I forgot that by adding another increment to the measurement, it changed the divider!

Another improvement for the future. Normally I use .454-inch round balls, but had these left over from the batch I did for my friend, and his chambers called for the slightly smaller diameter round balls.

I'm hoping to produce a cardboard-sleeved variation in the next couple/few weeks. Please keep the ideas coming, and let me know if I missed or made a mistake on anything else!

I'm putting this one aside as my "original". Don't worry - I'm not going to tear through the label! :D
Image
User avatar
Ysabel Kid
Moderator
Posts: 27903
Joined: Mon Sep 17, 2007 7:10 pm
Location: South Carolina, USA
Contact:

Re: “Arts & Crafts” (lots of pictures)

Post by Ysabel Kid »

Old No7 wrote:Well done Jay.

Your "sorority girls" will love those!
I've got to keep my lovely ladies in bling, don't you know! :wink:
Old No7 wrote:Glad to see you finally got some "me time" at the house -- hope you had some nice dinners and chat with the family too. :wink:
Old No7
It was great. First time I've had a full week of dinners with my wife and kids in probably half a year. I really miss it. More so knowing that this is Y2K's senior year in high school, and next year he'll be off to college somewhere. I took the day off yesterday and drove him down to Wofford College in Spartanburg for a "Senior Specialty Visit". I'm proud and terrified at the same time! :shock:
Image
User avatar
Buck Elliott
Member Emeritus
Posts: 2830
Joined: Mon Sep 10, 2007 12:15 pm
Location: Halfway up Sheep Mountain -- Cody, Wyoming

Re: “Arts & Crafts” (lots of pictures)

Post by Buck Elliott »

Dental floss would make dandy pull strings, if you decided to go that route again..

I've even used it to make bowstrings in the old days, because it's rayon and doesn't stretch..
Regards

Buck

Life has a way of making the foreseeable that which never happens, and the unforeseeable, that which your life becomes...
User avatar
Ysabel Kid
Moderator
Posts: 27903
Joined: Mon Sep 17, 2007 7:10 pm
Location: South Carolina, USA
Contact:

Re: “Arts & Crafts” (lots of pictures)

Post by Ysabel Kid »

Buck Elliott wrote:Dental floss would make dandy pull strings, if you decided to go that route again..

I've even used it to make bowstrings in the old days, because it's rayon and doesn't stretch..
I never thought of that. What a great idea! Thanks!!!
Image
hondo1892
Senior Levergunner
Posts: 1112
Joined: Sat Feb 21, 2009 8:21 pm

Re: “Arts & Crafts” (lots of pictures)

Post by hondo1892 »

Those are cool looking. You can get some nice period fonts from Walden fonts company. Kinda pricey for just cartridge boxes but they do have some nice stuff. Show the us the sleeved boxes when you do them.
Post Reply