I started working on the metal today. I don't know if many here do their own metal finishing but it really is drop dead easy (skill wise) to do your own metal polishing and rust bluing. I sort of dread doing it until I get started, and then it's a bunch of fun and I enjoy the sweat equity in each of my rifles. When they are done, I am more than happy to show off my results and brad a bit. I think they can be as good any any top-flight gunsmith/builder's work. Anyway, I thought I would show some of the process and today was the "draw" filing day just in case some of you might be contemplating some DIY sweat equity investment.
Barrels are not easy to photograph, but this is the barrel prior to much work being done on it. You can see the serrations from the milling of the octagon flats in this picture. Removing them is the first objective of draw filing.

When draw filing it it imperative to keep the file perfectly flat on the barrel's flat. This is impossible to do actually, but I can come close by holding the file with two hands very close to the barrel. I let my thumbs from each hand ride on the flats on either side of the flat I am filing. I can't show my hands in this picture and still take the picture, so you have to imagine it I guess. Actually, I prefer to push my file instead of "drawing" (pulling) it towards me. Either way, works. Here you can see that the flat appears to be concave in cross section, since the center of the flat is untouched by the file while the left and right edges are being worked by the file. This is actually a sign that I am not holding the file perfectly flat on the barrel. It is impossible not to rock from side to side very slightly. But minimize this all you can. And whatever you do, do not let the file slip off the edges of the flat or you will cut deep serrations in the edges of the barrel. They are all but impossible to file out w/o swamping the barrel, and you not want that.

As an alternative to holding the file crosswise and pulling or pushing it along the flat, I sometimes put the file lengthwise on the flat and push it along. I don't do this much, but it works for going over dovetails and some other issues of irregularity initially. It also is much easier to hold it flatter to the barrel. If you do this, be sure that the tail of the file is not scratching a groove as you go. This particular Nicholson file happens to have a stamp on the handle on one side that really protrudes and scratches up the surface. Also, filing this way makes it easy to clog the file and that leads to galling of the surface you are trying to smooth. So only one or two strokes, then clean and repeat.

Keeping the file clean is really REALLY
REALLY important. Just one speck of steel filings in the teeth will cause a nasty groove in your surface that will be very very hard to get out on the next step (wet/dry paper or fine emory cloth). The tricks are hard to find, but for me, I make a few strokes, clean with my thumb. I also use a very new file (a small 6" Nicholson in this case), and I make a point to clear my filings from the surface and never file over loose filings on the barrel. Here you can see a single speck of steel clogging that will gouge my barrel if I continue w/o clearing it. I use a file carding brush on the stubborn clogs.

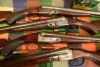
Keeping files clean and sharp can be a lot easier if they are stored carefully. This is where my files hang out when not in use.

If done right, the barrel should be very uniformly smooth and white. I use a light off to the side to try to shadow line grooves and gouges and I touch those up before moving on to the next flat. BTW, I always start out on the bottom flats and then work up the sides, leaving the top flats to last, when I have myself well practiced and warmed up. I want my best work on those top flats that I will see the most often. Also, when I file a barrel, I can't stroke the entire length from on end to the other like I can when using the wet/dry paper later in the process. If I do, I either tilt the file too much or I clog the teeth and gouge the barrel. So, I so strokes of 5-7 inches at a time. And I go up and down the barrel several times for each flat, being careful to overlap sections well, and not cause low spots in a flat due to filing too much at one location. Later, I'll be running paper, backed by hard blocks of wood, the entire length of the barrel to make sure the surface is flat from front to back as well as left to right. Flatness is everything here and anything less than the best job possible is instantly visible in the final product (even though you may not notice it right now prior to the blueing).

I'll post some more pics at the process goes along. It will become a messy job soon, making pictures a bit harder, but I'll manage or hire my wife to take some

Oh yeah, one more thing - you really gotta try to be smarter than me when you pull the barrel off.... This is just one example of why I am not a gunsmith.